Pripojeni VPN pro Windows 7/en: Porovnání verzí
(Založena nová stránka s textem „=== Step 10 ===“) |
(Založena nová stránka s textem „Here choose the option ''Get IP address from DHCP server automatically''. Write IP address 158.194.244.2 to ''Preferred DNS server''. Now we've set up ever…“) |
||
| Řádek 59: | Řádek 59: | ||
=== Step 10 === | === Step 10 === | ||
Here choose the option ''Get IP address from DHCP server automatically''. Write IP address 158.194.244.2 to ''Preferred DNS server''. Now we've set up everything we need to use the VPN network. | |||
[[File:Vpn win7 09.png|center|Vpn win7 09.png]] | [[File:Vpn win7 09.png|center|Vpn win7 09.png]] | ||
Verze z 29. 10. 2015, 14:58
Tento překlad obsahuje chyby a nejasnosti, které budou zavčas opraveny.
You can find all the basic and necessary steps which must be done before you connect to eduroam WiFi at page with all the basic information regarding UP network. You should continue reading this manual only after you finish all the necessary steps. So, how to we set up the VPN?
Step 1
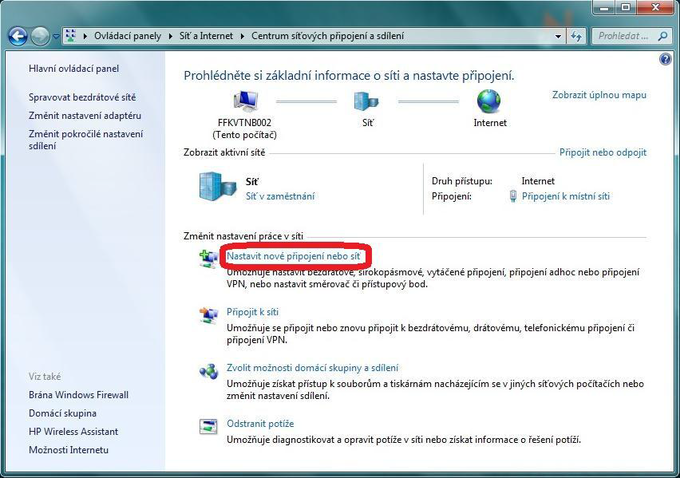
Right-click the wireless connection button and choose Network and sharing center. When a new window opens up choose option Set up a new connection or network.
Step 2
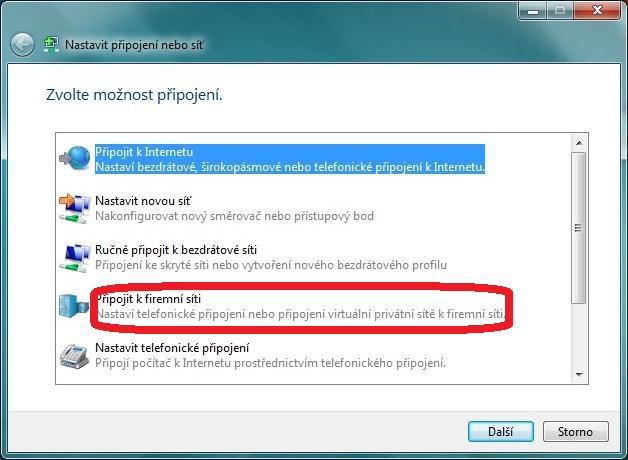
Set up connection or network tab opens up. Choose Connect to the company network option.
Step 3
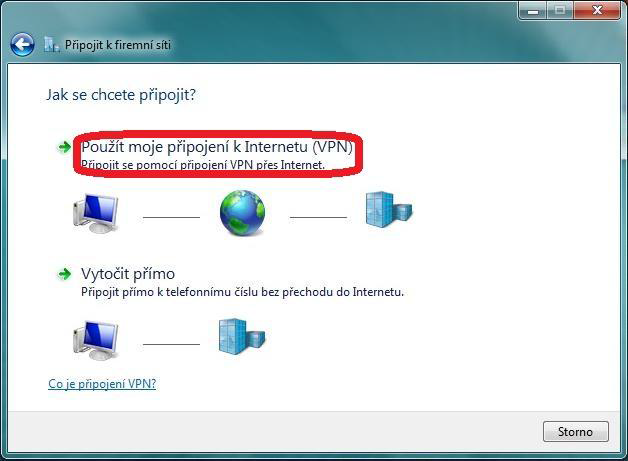
Choose Use my connection to the Internet (VPN) in the next window.
Step 4
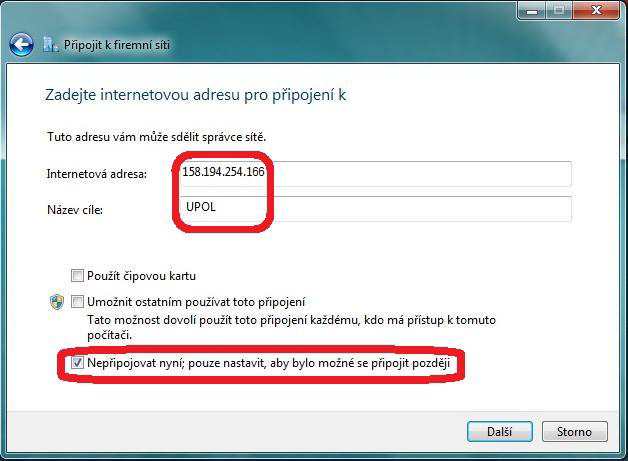
Fill in the IP address 158.194.254.9 into the box Internet address. Target name can be anything you'd like and you'd remember it is a UP VPN network, for e.g. UPOL or UPOL VPN. Enable the option Do not connect now as we have to finish setting up the network. Click on the button Next.
Step 5
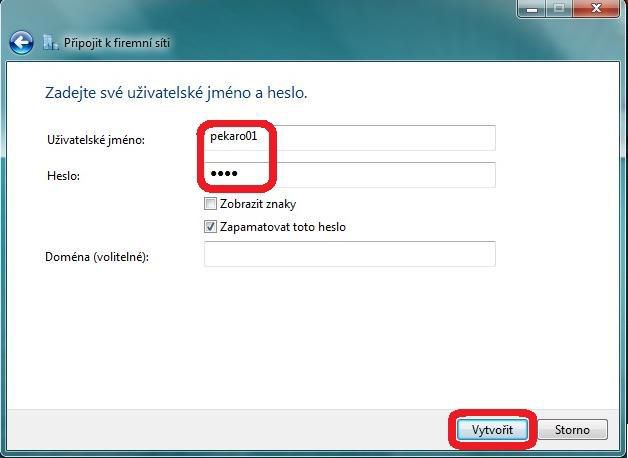
Now you should input your login details and the password you set up at Portal ID. Choose the option Remember this password and accept every change by the button Create.
Step 6
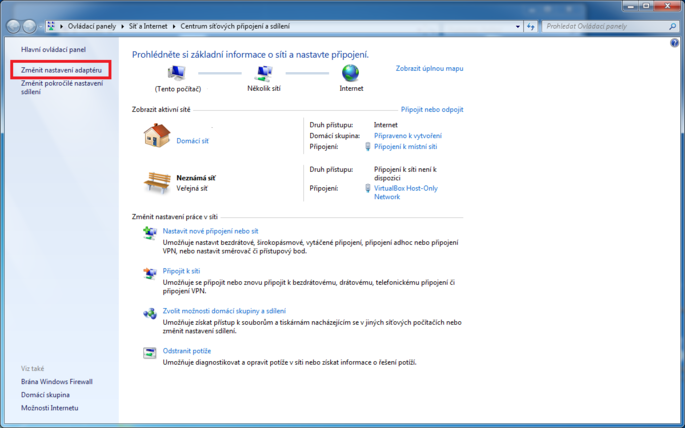
Just as in step 1, right-click the wireless connection button and choose Network and sharing center. When a new window opens up choose option Change adapter settings.
Step 7
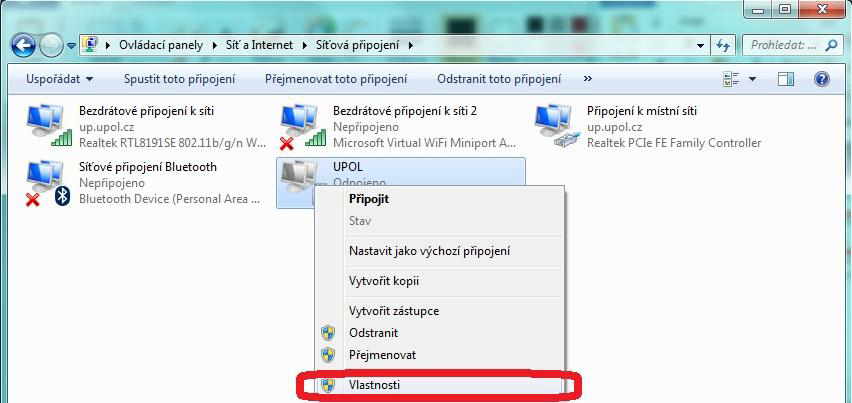
You can find your newly created VPN in Network connections folder. Right-click it and choose Properties.
Step 8
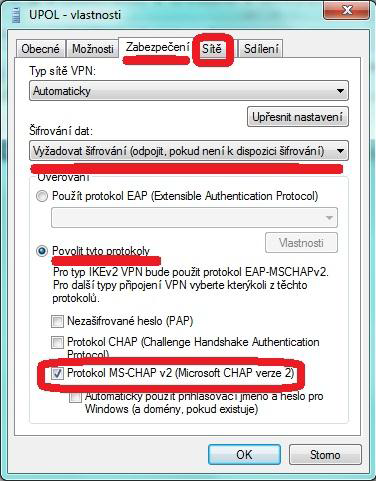
Check the IP address 158.194.254.9 in the General tab. Set up Ciphering data option Require ciphering and in the Verification choose option Enable these protocols, where you should enable protocol MS-CHAP v2. Then move on to the Networks tab.
Step 9
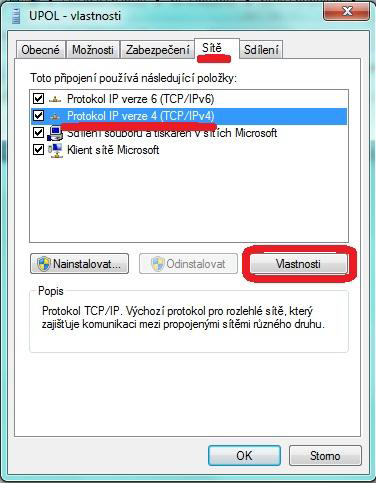
Choose Protocol IP version 4 (TCP/IPv4) in the Networks tab. Then click on Properities.
Step 10
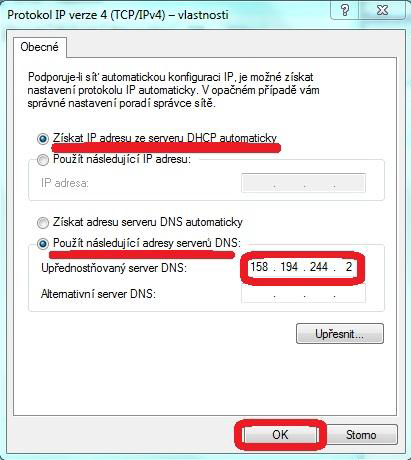
Here choose the option Get IP address from DHCP server automatically. Write IP address 158.194.244.2 to Preferred DNS server. Now we've set up everything we need to use the VPN network.
Krok 11
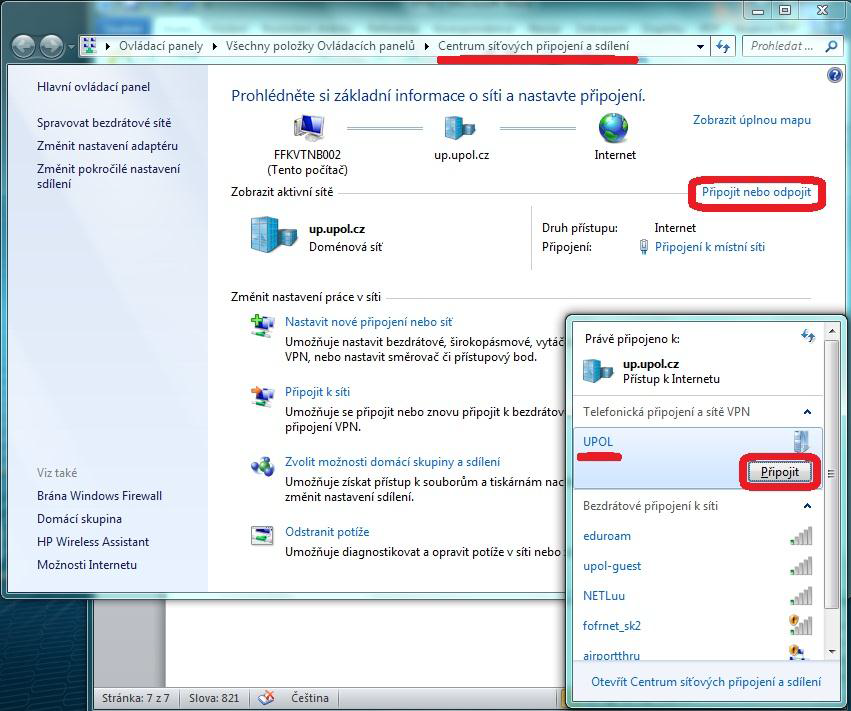
Síť VPN aktivujeme jednoduše. Klikneme na ikonku bezdrátových připojení a vybereme VPN síť UPOL a klikneme na Připojit. Existuje i druhá varianta, kdy v Centru síťových připojení kliknete na volbu připojit nebo odpojit, kliknete na VPN síť UPOL a dáte Připojit.
Krok 12
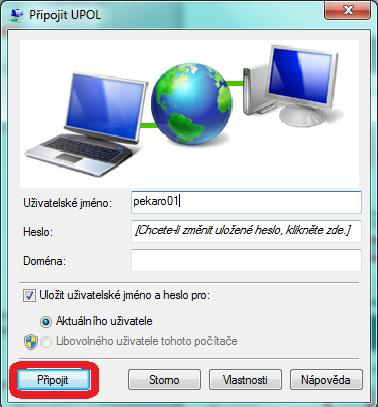
Objeví se vám přihlašovací okno, kde byste měli mít vyplněné své přihlašovací údaje. V případě, že tomu tak nebude své přihlašovací jméno a heslo znovu nastavte. Pole Doména nechejte volné a poté sePřipojte.
Budete-li se chtít po dokončení práce odhlásit, klikněte opět na ikonku bezdrátového připojení na hlavním panelu a vyberte možnost Odpojit.
