Mozilla Thunderbird Office365/en: Porovnání verzí
(Založena nová stránka s textem „center|Thunderbird stud en 05.png“) |
(Založena nová stránka s textem „Now you have successfully set up your account and you can use your mail client. Computer NetworkCategory:ManualsCategor…“) |
||
| Řádek 30: | Řádek 30: | ||
[[File:Thunderbird stud en 05.png|center|Thunderbird stud en 05.png]] | [[File:Thunderbird stud en 05.png|center|Thunderbird stud en 05.png]] | ||
Now you have successfully set up your account and you can use your mail client. | |||
[[Category: | [[Category:Computer Network|Computer Network]][[Category:Manuals]][[Category:E-mail client setup manuals|E-mail client setup manuals]] | ||
Verze z 19. 11. 2015, 07:51
If you are using Mozilla Thunderbird and you want to add your university e-mail account to it, please, follow the next few steps.
Step 1 - Setting up an account
Click Options in the upper right corner and choose Account settings.
Step 2 - Add an account
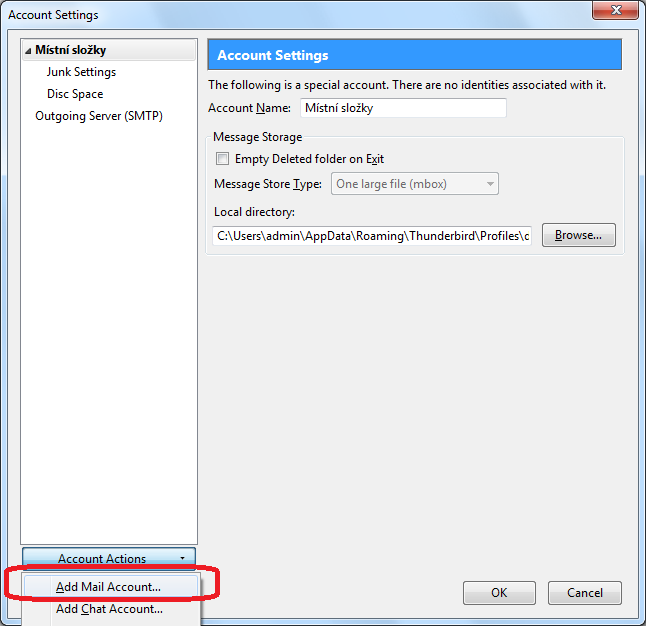
Click the Account actions and then choose the Add mail account option.
Step 3 - Creating a new account
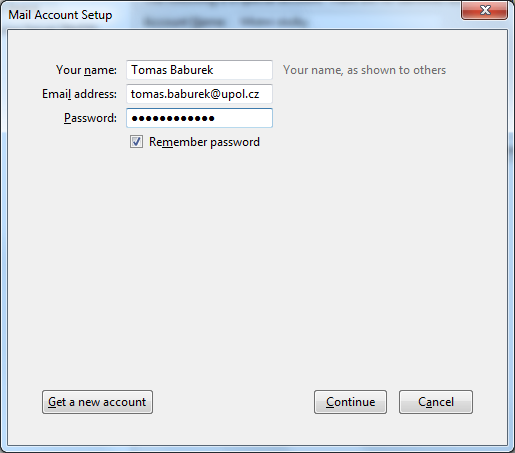
Enter your login details and click Continue. Your e-mail adress is in name.surnameXX@upol.cz format and password is the one you've set up in Portal.
Step 4 - Manual configuration
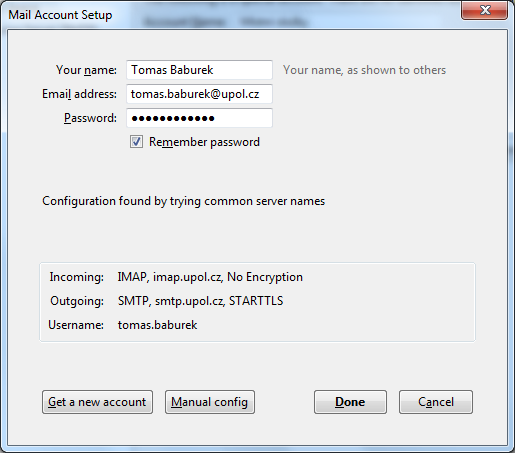
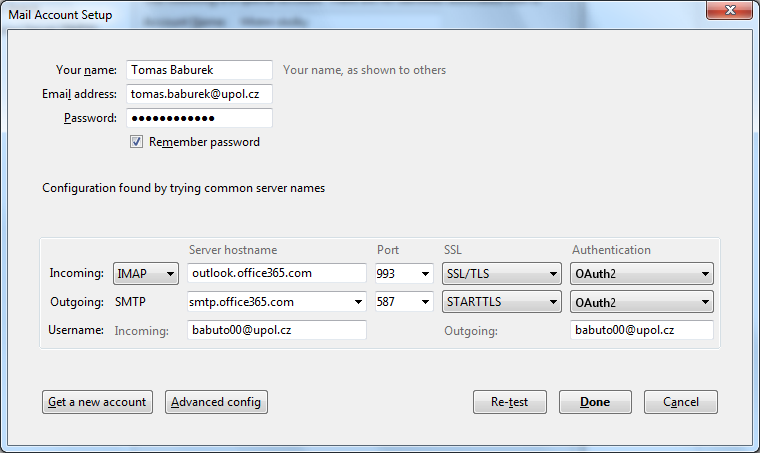
Thunderbird will try to detect the necessary settings, which will not be successful. Then choose the Manual config option.
IMAP server address is outlook.office365.com', port 993 and SSL/TLS. SMTP address is smtp.office365.com, port 587 and set STARTTLS. Your username is PortalID@upol.cz. Set authentization in IMAP and SMTP to Password, secured transmission and click OK.
Now you have successfully set up your account and you can use your mail client.


