Mail (OSX) Office365/en: Porovnání verzí
Bez shrnutí editace |
Bez shrnutí editace |
||
| Řádek 1: | Řádek 1: | ||
<languages /> | <languages /> | ||
If you're using | If you're using a Mac computer and you want to have an easy access to your university mail, you can use the pre-installed Mail app. | ||
=== Step 1 - Add an account === | === Step 1 - Add an account === | ||
Verze z 9. 7. 2018, 13:11
If you're using a Mac computer and you want to have an easy access to your university mail, you can use the pre-installed Mail app.
Step 1 - Add an account
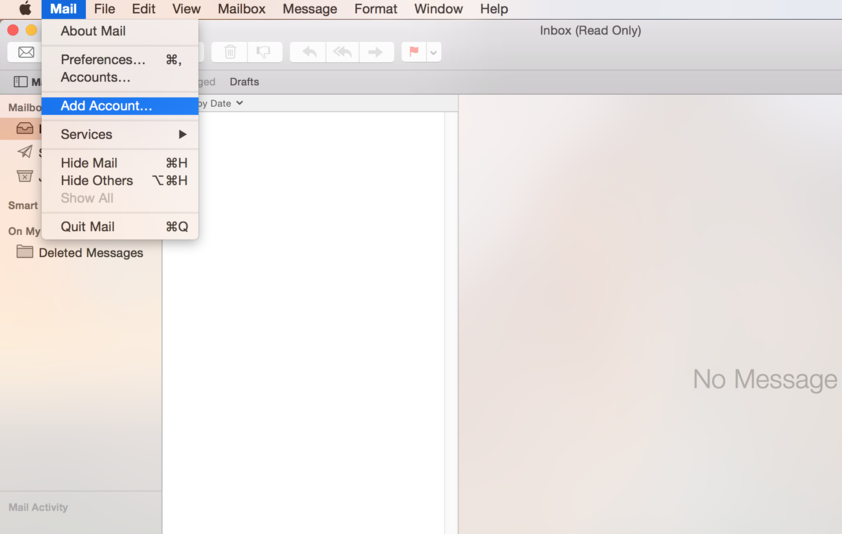
First, launch the Mail app from your Launchpad (or Dock) and click the Mail tab and choose Add account option.
Step 2 - Account type
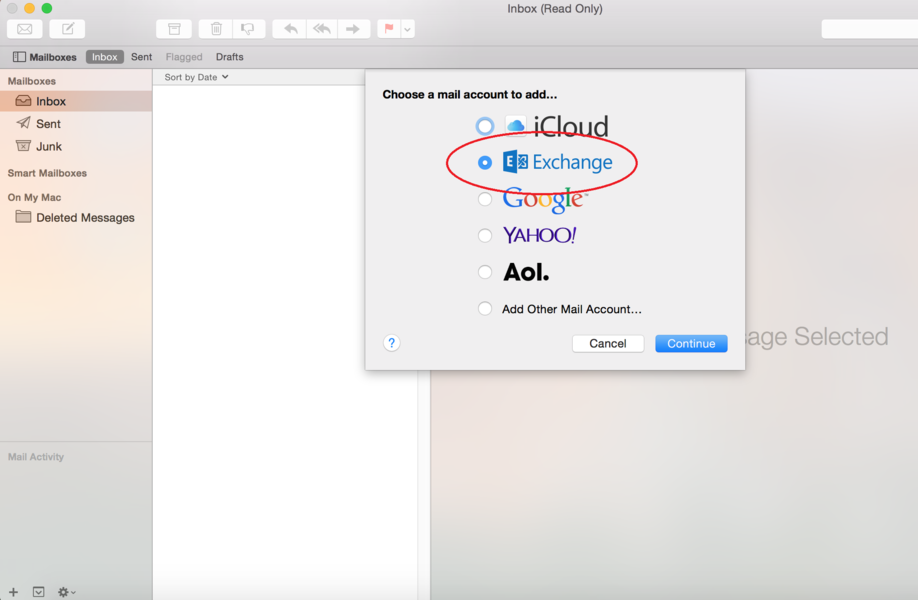
In order to connect to our mail servers you have to use the Exchange protocol, which will set almost everything for you.Therefore, choose the Exchange account.
Step 3 - Enter information
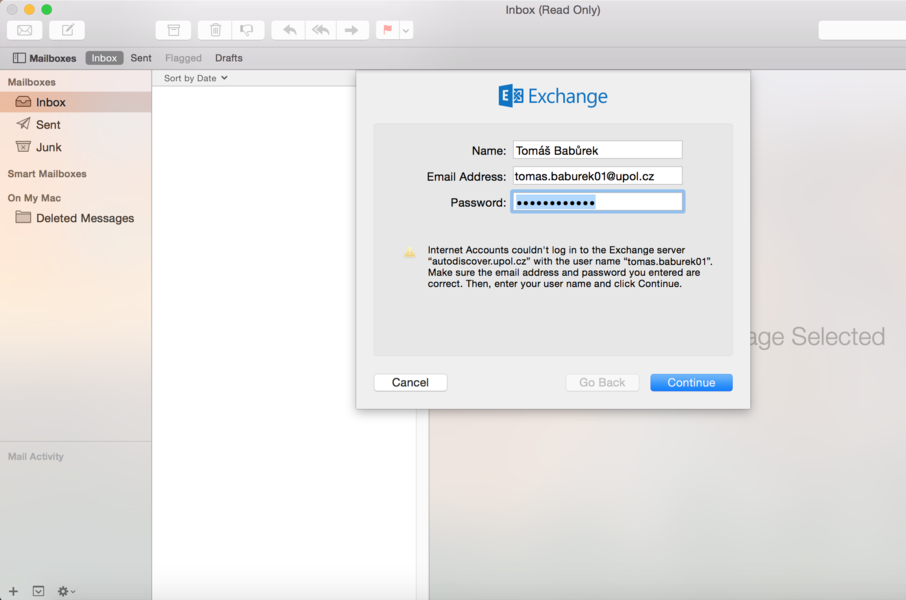
Fill in your name, e-mail address and password you set up in Portal. Your e-mail adress is name.surname@upol.cz. When you click Continue the app will fail to search for a server address. That's alright. Click the Continue button.
Step 4 - Account setting
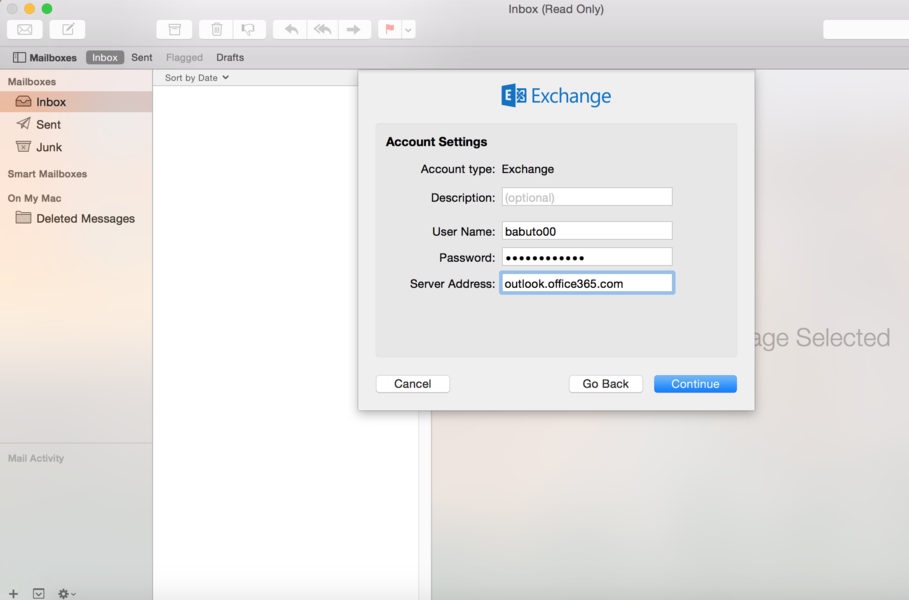
Let's move on to few changes in the account setup. Enter your Portal ID to the User box, then enter your password, and enter outlook.upol.cz to the Server address box. Then click the Continue button.
Step 5 - Account overview
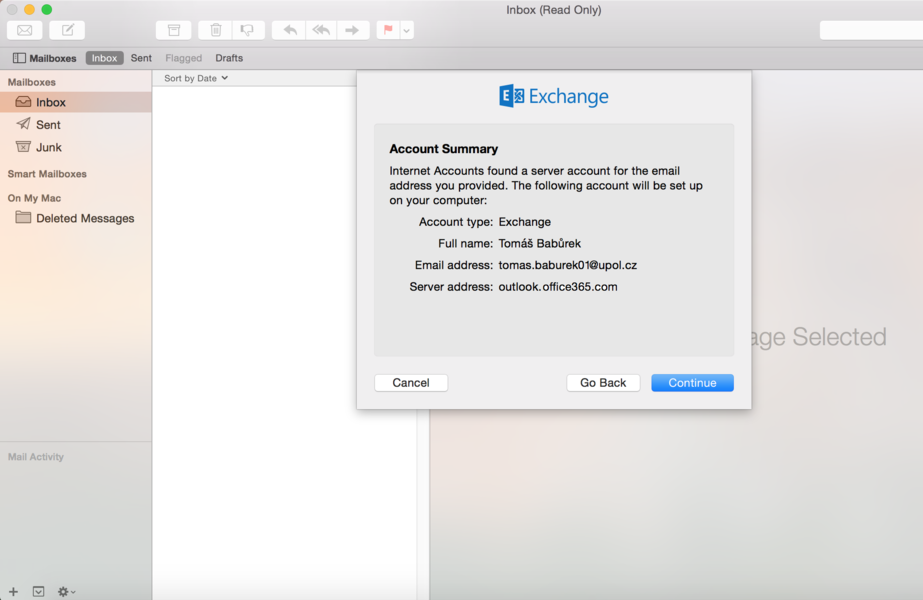
Your Mail app will show you the basic information overview. Click Continue if everything is correct. If you made a mistake somewhere, click the Back button.
Step 6 - Synchronization
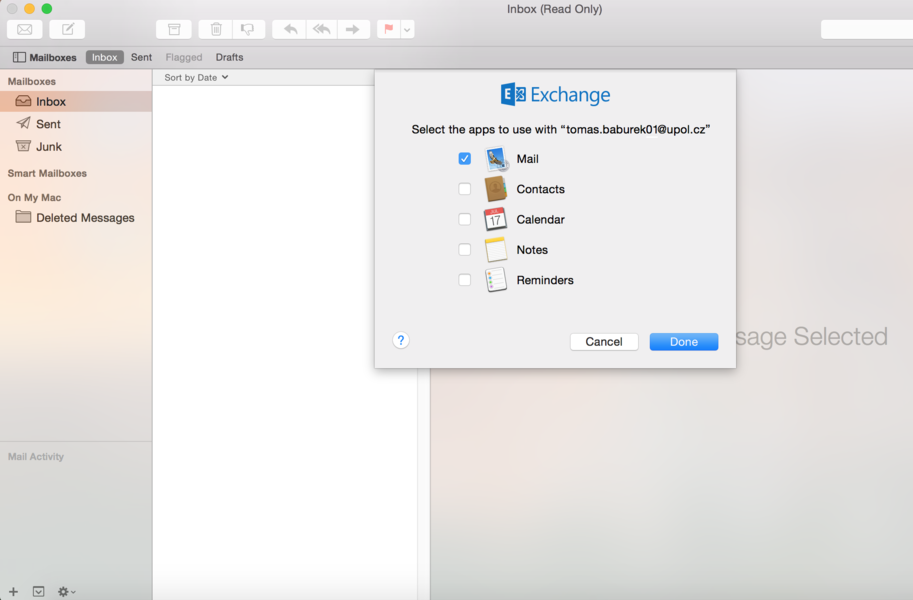
Once you've finished the setup, you can choose apps to sychchronize your e-mail with. When you're done, click Continue to exit the setup. Now you can start using your e-mail client.
