Mozilla Thunderbird Office365/en: Porovnání verzí
Bez shrnutí editace |
Bez shrnutí editace |
||
| Řádek 4: | Řádek 4: | ||
=== Step 1 - Setting up an account === | === Step 1 - Setting up an account === | ||
Click '''Settings''' in upper right corner and choose '''Account settings'''. | Click '''Settings''' in the upper right corner and choose '''Account settings'''. | ||
[[File:11.png|center|11.png]] | [[File:11.png|center|11.png]] | ||
Verze z 13. 11. 2015, 08:17
If you are using Mozilla Thunderbird and you want to add your university e-mail account to it, please, follow the next few steps.
Step 1 - Setting up an account
Click Settings in the upper right corner and choose Account settings.
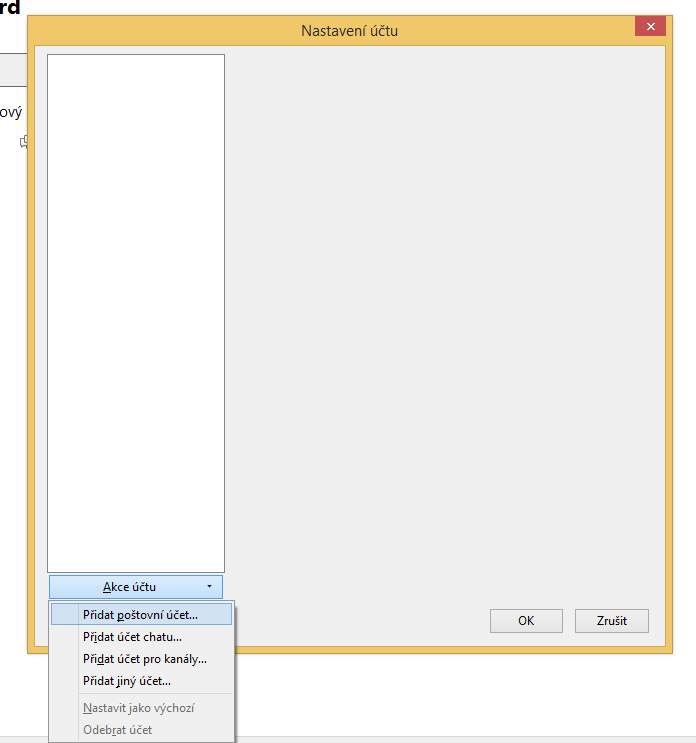
Step 2 - Add account
Click the Account actions"" and then choose Add mail account.
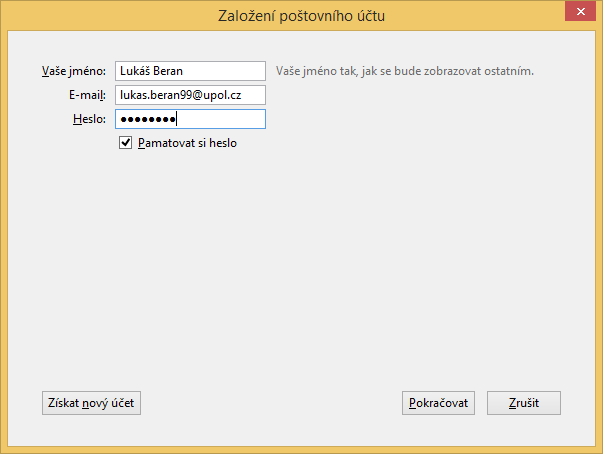
Step 3 - Creating new account
Fill in all the information necessary and click Continue. Your e-mail adress is "name.surnameXX@upol.cz and password is the one you set up in portal.
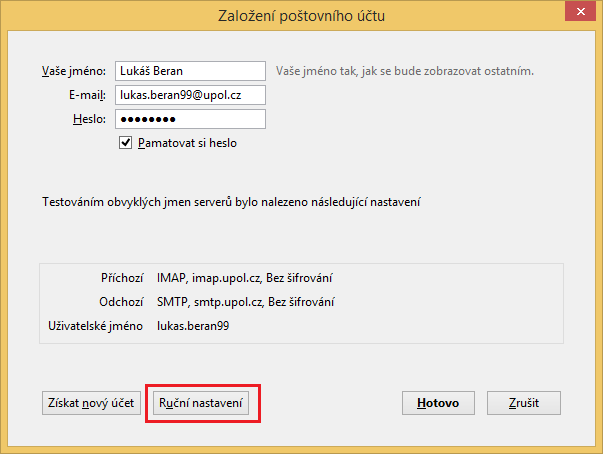
Step 4 - Manual configuration
Thunderbird will try to detect all the necessary settings, which will not be successful, and it will detect all the incorrect settings. Choose option Manual config.
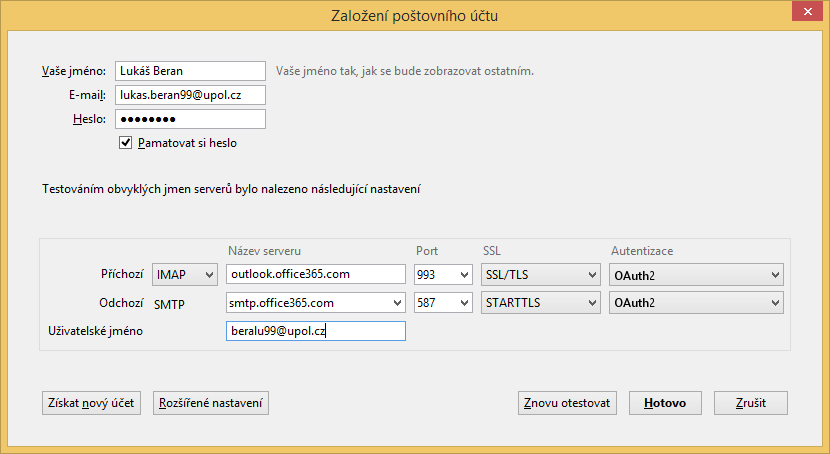
IMAP server address is outlook.office365.com', port 993 and SSL/TLS. SMTP address is smtp.office365.com, port 587 and set STARTTLS. Your username is PoratlID@upol.cz. Set authentization in IMAP and SMTP to Password, secured transmission. Then click OK.
Now you have successfully set up your account and you can use your mail client.


