Outlook 2013 Office365/en: Porovnání verzí
Bez shrnutí editace |
Bez shrnutí editace |
||
| Řádek 30: | Řádek 30: | ||
You need to restart you e-mail client once you set it up. Furthermore, you might be asked to enter your login details again (your login is PortalID@upol.cz). | You need to restart you e-mail client once you set it up. Furthermore, you might be asked to enter your login details again (your login is PortalID@upol.cz). | ||
[[File: | [[File:Outlook2013 stud en 05.png|center|Outlook2013 stud en 05.png]] | ||
[[Category:Počítačová síť|Počítačová_síť]]<br/>[[Category:Návody]]<br/>[[Category:Návody pro nastavení e-mailového klienta|Návody_pro_nastavení_e-mailového_klienta]] | [[Category:Počítačová síť|Počítačová_síť]]<br/>[[Category:Návody]]<br/>[[Category:Návody pro nastavení e-mailového klienta|Návody_pro_nastavení_e-mailového_klienta]] | ||
Verze z 16. 11. 2015, 13:16
In order to connect to our mail servers using Outlook 2013 you have to use the Exchange protocol, which will set almost everything for you. Therefore, choose the Exchange account.
Step 1 - Add an account
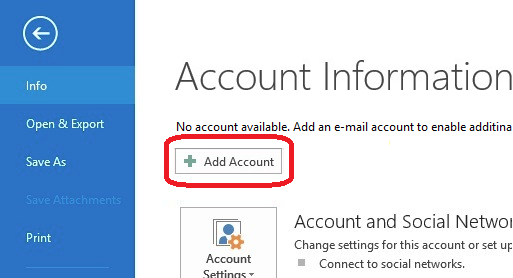
Click File - Add Account in Outlook.
Step 2 - Fill in information
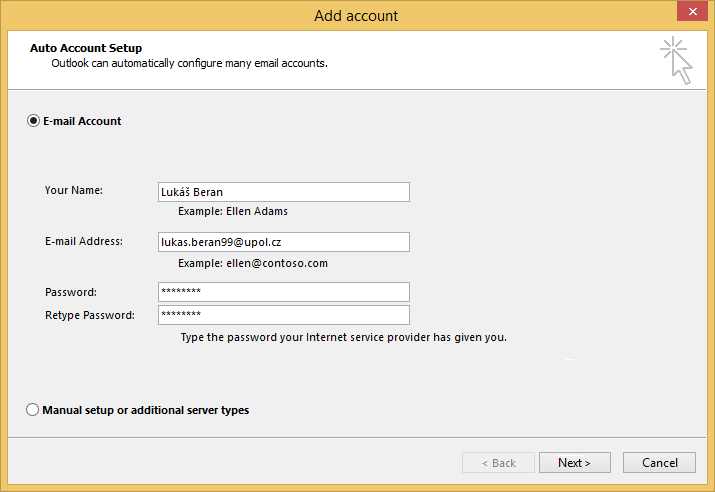
Choose the option E̠-mail account and enter the required information (e-mail address should be in name.surnameXX@upol.cz format, your e-mail password set up in Portal). Then click Next.
Step 3 - Login details
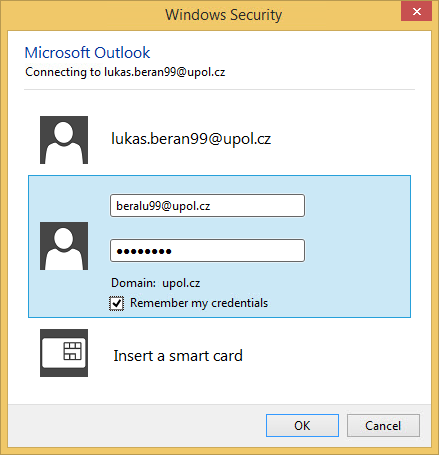
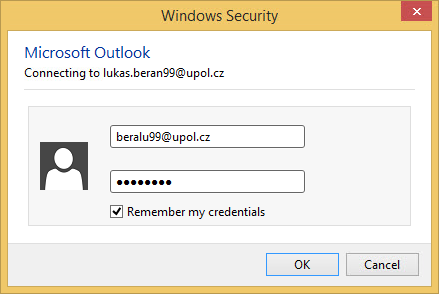
Enter your login details in the next window. Your login is your Portal ID in form PortalID@upol.cz. (Noticeː This is not your e-mail addressǃ) You should set your password up in Portal.
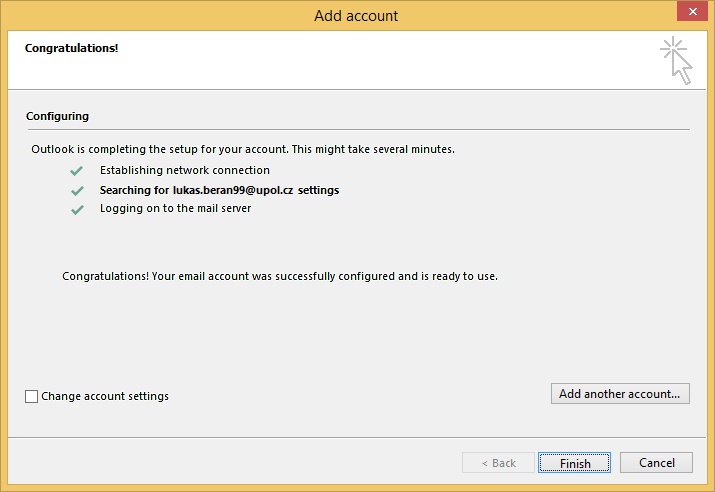
Your e-mail client should be set up successfully.
Step 4 - First startup
You need to restart you e-mail client once you set it up. Furthermore, you might be asked to enter your login details again (your login is PortalID@upol.cz).
