Outlook 2013 pro zamestnance/en: Porovnání verzí
(Založena nová stránka s textem „=== Step 3 - Fill in information ===“) |
(Založena nová stránka s textem „Now you have to fill in the following informationː your e-mail address in form ''name.surname@upol.cz'', account type ''IMAP'', incoming mail server ''out…“) |
||
| Řádek 48: | Řádek 48: | ||
=== Step 3 - Fill in information === | === Step 3 - Fill in information === | ||
Now you have to fill in the following informationː your e-mail address in form ''name.surname@upol.cz'', account type ''IMAP'', incoming mail server ''outlook.upol.cz'', outgoing mail server ''smtp.upol.cz''. Your user name is your Portal ID and your password is your e-mail account password. Then click the ''Next'' button. | |||
[[File:Outlook2013 zam 07.png|center|Outlook2013 zam 07.png]] | [[File:Outlook2013 zam 07.png|center|Outlook2013 zam 07.png]] | ||
Verze z 10. 11. 2015, 09:26
You use the Exchange protocol when connecting to you e-mail using Outlook 2013, therefore you do not need to deal with an overly complicated setup. Everything should, if there are no problems, be set up automatically.
Automatic e-mail client setup
You can add your e-mail account automatically without any advanced setup of Outlook 2013 client.
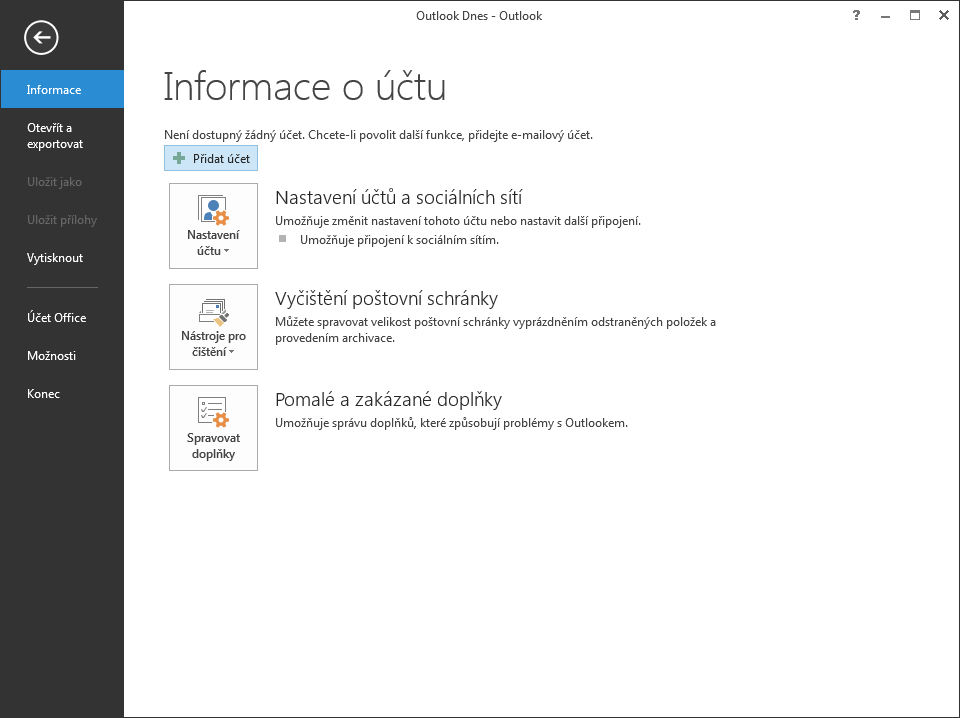
Step 1 - Add account
Click Information tab and choose Add account.
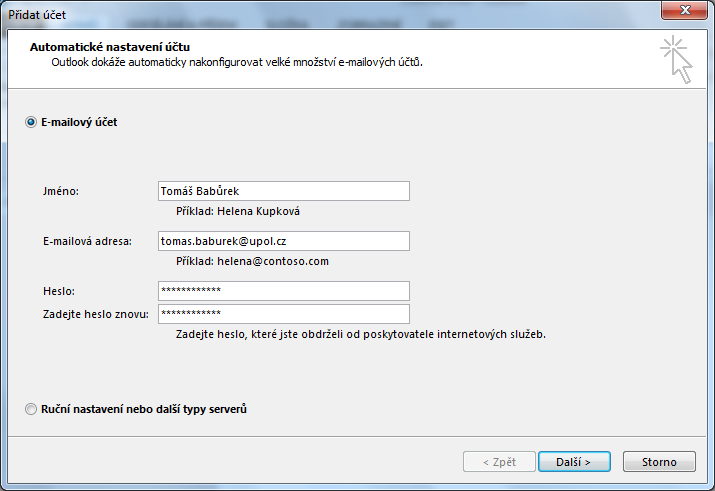
Step 2 - Account setup
Choose option E-mail account and fill in all the necessary information (your e-mail address should be in form of name.surname@upol.cz)
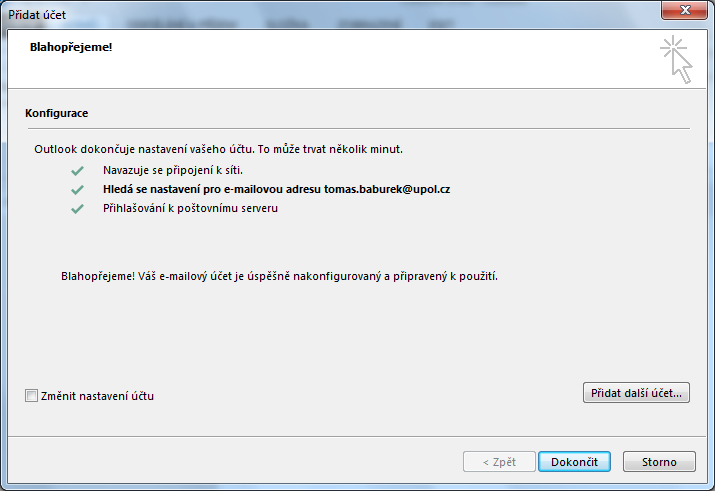
Step 3 - Configuration
Everything should be set up sucessfully now.
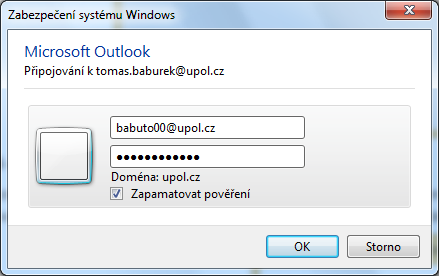
Step 4 - First login
You need to restart you e-mail client after setup. You might be asked to fill in your login details again, your login is PortalID@upol.cz. Check the option Remember my credentials.
Manual e-mail client setup
If you are unable to set your e-mail client up using the Exchange protocol, use IMAP protocol.
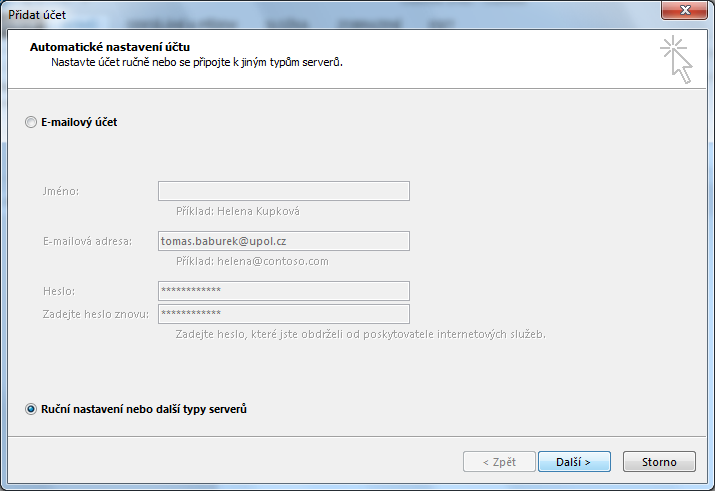
Step 1 - Choose manual setup
Instead of writing down all of your information choose Manual setup or additional server types.
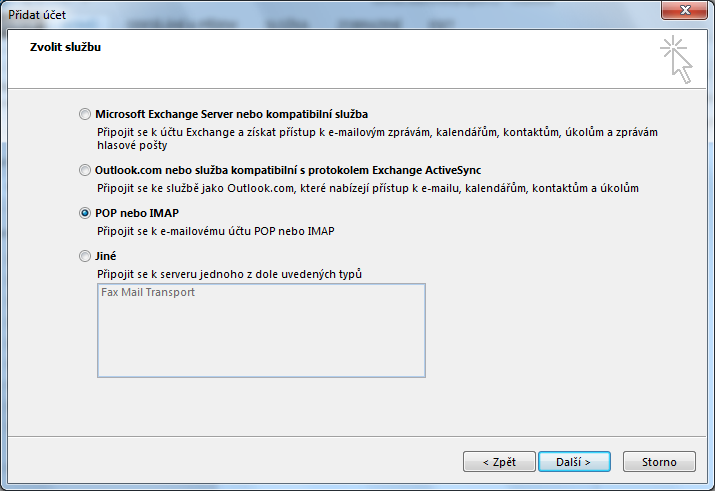
Step 2 - Connection type
Choose POP or IMAP service and click the Next button.
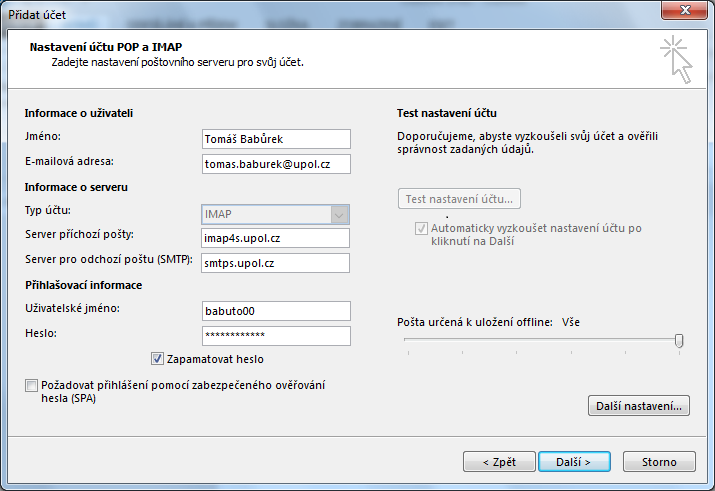
Step 3 - Fill in information
Now you have to fill in the following informationː your e-mail address in form name.surname@upol.cz, account type IMAP, incoming mail server outlook.upol.cz, outgoing mail server smtp.upol.cz. Your user name is your Portal ID and your password is your e-mail account password. Then click the Next button.
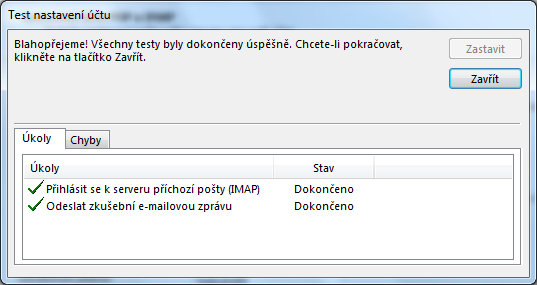
Krok 4 - Závěrečný test schránky
Spustí se automatický test nastavení účtu. Pokud jste vše správně nastavili správně, můžete kliknout na tlačítko zavřít. Vaše e-mailové schránka je nyní nastavena.
